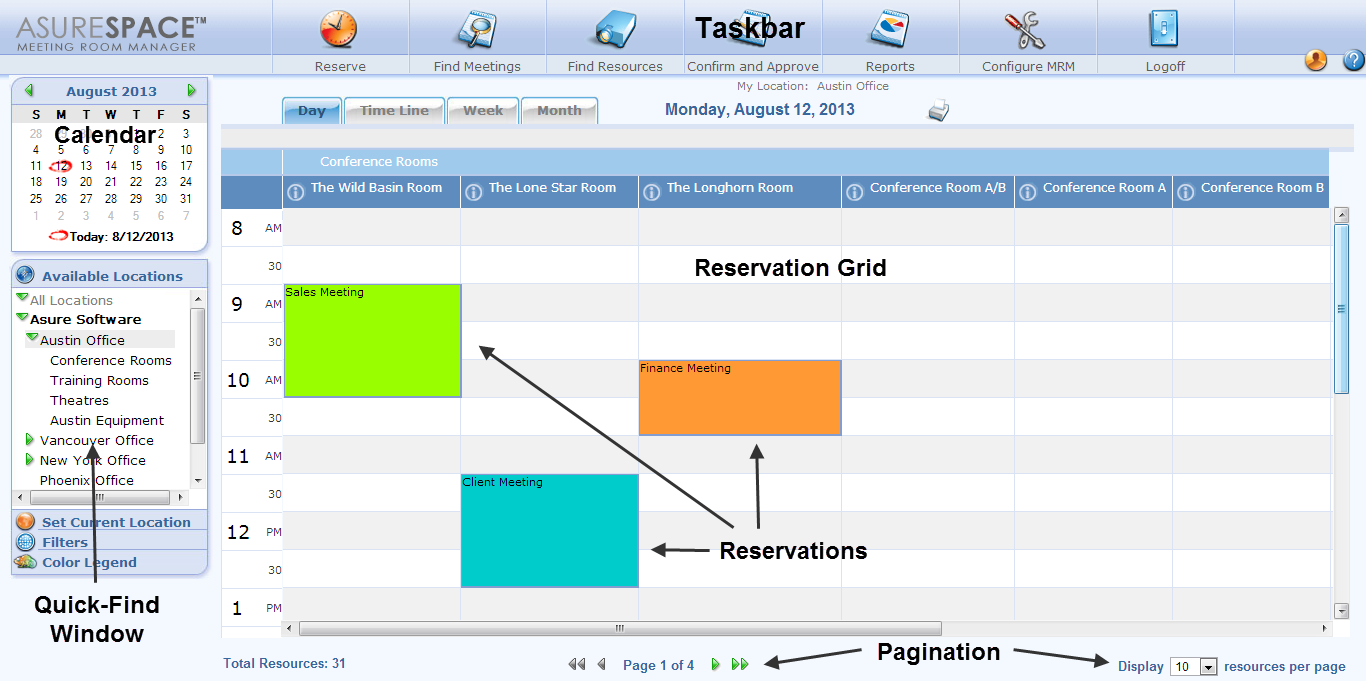
The MRM user interface, called the MRM Web Client, is shown below. It is composed of several parts, labeled in the diagram below.
Task Bar
Clicking on these icons will initiate various functions as described.

Reserve – the Reserve icon launches the Reservation Details form, allowing users to create a new reservation.
Find Meetings – this icon opens the Find Reservations form. Users can search for reservations based on specific criteria such as meeting title or host name. This form can be customized to include organization-specific search criteria.
Find Resources – similar to Find Meetings, this form allows users to search for Resources based on specific criteria. This form is also customizable.
Confirm & Approve – this icon is only available to users who have the Confirm Meetings permission granted in their security group. Typically a Location Admin, these users can confirm or reject meeting requests, tentative reservations and wait listed meetings.
Reports – this icon is also limited by security group. The Reports icon gives access to the MRM Reporting module and is usually only made available to Location Admins and service providers.
Configure MRM – this icon launches the Administration page in MRM. Options within this page can be limited by security group. More details on the Administration page in the next section.
Logoff – select this icon to close your open session in MRM.
 Typically,
there are a limited number of user licenses available to an organization. Users
must select logoff to release their current user license. Closing
the browser window will not release the license. For more information
on controlling user licenses and managing access denied users, please
see Users & Security Groups.
Typically,
there are a limited number of user licenses available to an organization. Users
must select logoff to release their current user license. Closing
the browser window will not release the license. For more information
on controlling user licenses and managing access denied users, please
see Users & Security Groups.
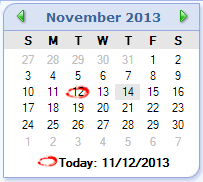
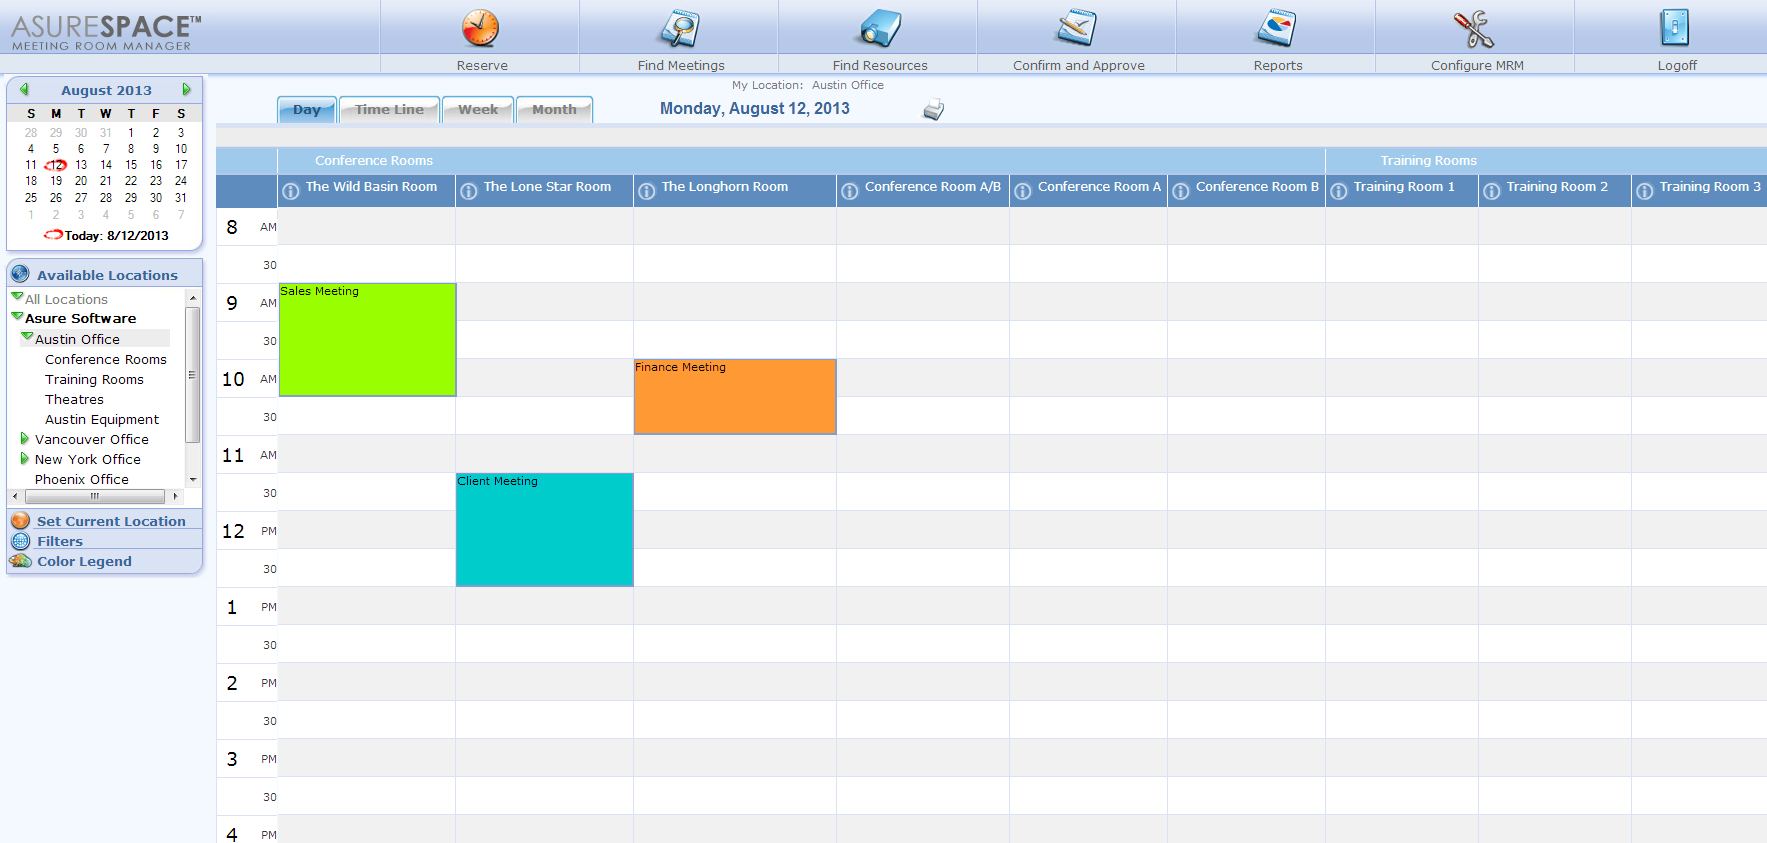
Clicking on a date displays all the reservations for that date on the reservation grid. Today’s date will be circled in red. The selected date (if different from today’s date) will be highlighted in gray.
This window in the lower left-hand corner of the screen displays different types of information depending on the link clicked.
 ·
·
Available Locations – this shows all of the location available in your organization. Selecting a specific location displays all of the resources in that location on the Reservation Grid. The locations displayed here are based on the individual user’s security permissions.
Set Current Location – this
sets the location you are working from for the current session. All
reservations will be shown in the time zone of the Current Location.
This setting overrides the Default Location specified in your User Profile until you log out. If you want to permanently change your Default Location, update your user profile.
Your Current Location is displayed in the My Location setting in the top, right-hand part of the Reservation Grid just below the Task Bar as shown.
Filters – this option allows you to filter the Reservations or Resources shown on the Reservation Grid based on pre-determined criteria.
·
Color Legend – this option defines the color coding that has been applied to Reservations. Colors are associated with specific Reservation Types.
This displays all existing reservations and the resources and time slots available for booking. You can display it at any time by going to the Available Locations quick display screen and then clicking on the location you want to see. Reservations can be color-coded by type. The grid’s appearance can be altered to suit your organization as shown in Configuring MRM options. The Reservation Grid offers four unique views: the Day View (shown), the Time Line View, the Week View and the Month View.
Right-clicking on a reservation causes a pop-up to appear with various options available.
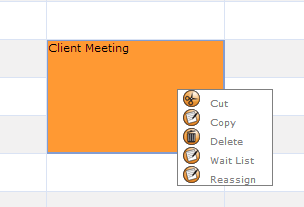
Cut or Copy – this cuts or copies a reservation so you can move it to a different time or location on the reservation grid. Click on an empty space to paste it.
Delete – this permanently deletes the reservation. This cannot be undone.
Wait List – this assigns the reservation to the wait list.
Reassign – this permanently assigns the reservation to a different organizer.
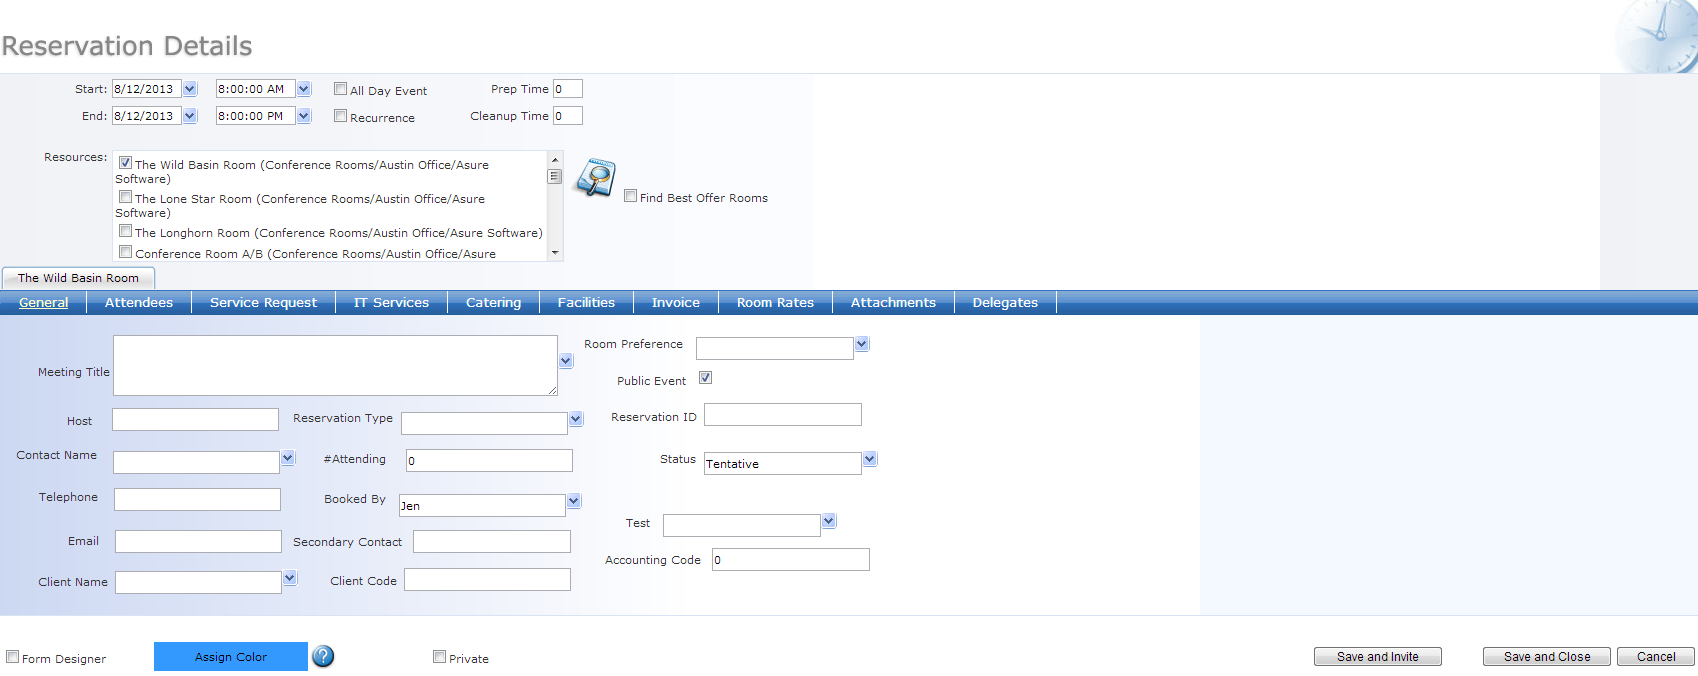
MRM has two primary forms, the Resource Details Form and the Reservation Details Form. These forms are divided into Tabs, which displays information about a reservation or resource in logical groupings. Tabs appear as a blue bar running horizontally across the form. By default, the General Tab is created on both forms and is always visible. All other tabs (both standard and custom) can be set as visible or hidden based on location, availability, or type. Tab settings are managed by the MRM Administrator.

How your service items are displayed depends on your choice for Service Management Model. See Choosing a Service Management Model for details.
The MRM Reservation grid has a paging functionality. If you have a large number of resources, you can view a limited number per page. Use the navigation keys to move between pages.

If all of your resources display on a single page, utilize the scroll bar to see additional resources.

|
|
We are interested in hearing from you about our products. Visit our customer support portal. Written for Meeting Room Manager 10.0, March 2014, Copyright © 2014 Asure Software Inc. |