 If
your organization offers a large number of resources, users may have to
navigate to different pages to find all desired resources. Selections
are not lost when moving
If
your organization offers a large number of resources, users may have to
navigate to different pages to find all desired resources. Selections
are not lost when moving
A multi-resource reservation is a reservation that includes more than one resource on a single date.
Click Reserve
in the MRM Task Bar or double-click an available spot on the Reservation
Grid to launch the Reservation
Details form.
Verify the date and adjust start and end
times as needed.
To add resources, select Find
Available Resources. The Find
Resources form appears. Select resources to add to your reservation
by checking the box next to the Resource name. Click Select to return to the
Reservation Details form.
If
your organization offers a large number of resources, users may have to
navigate to different pages to find all desired resources. Selections
are not lost when moving
from page to page. After multiple resources have been selected, the Select function will add all resources to the reservation.
The Reservation Details form displays with all selected resources assigned.
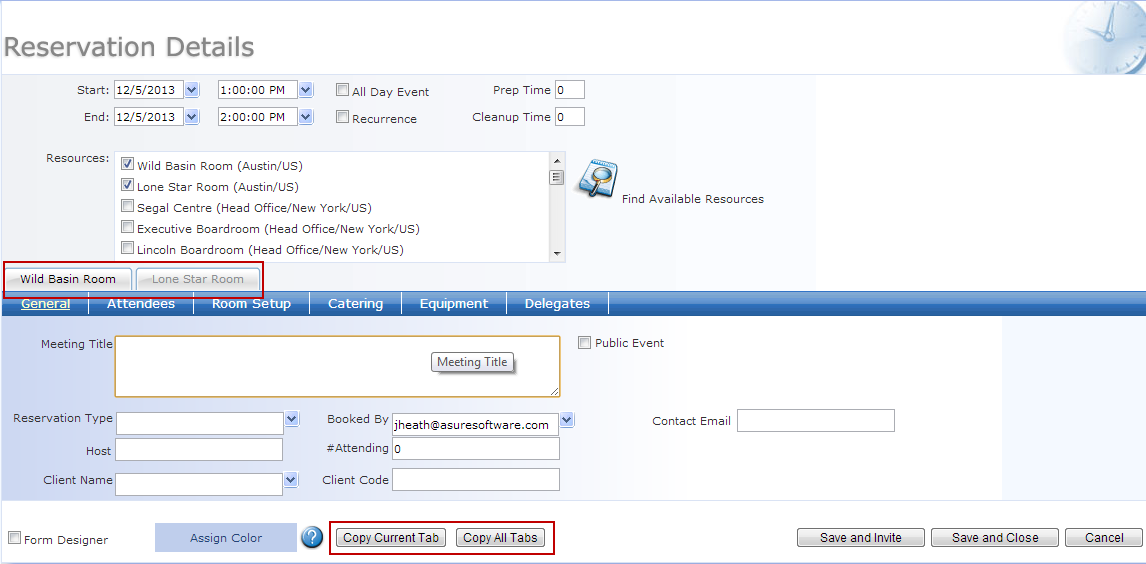
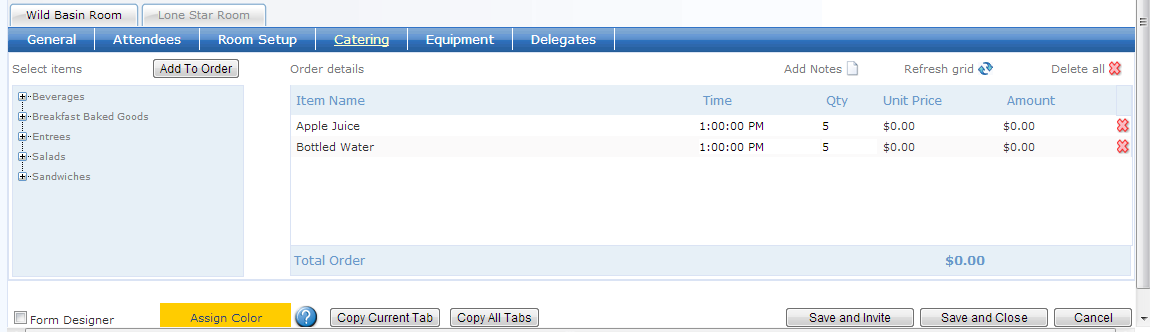
One resource tab will be highlighted while the others are grayed out. The highlighted resource is the current selected resource. Each resource carries its own set of tabs (General, Attendees, and Services). Unique options can be selected for each resource within the reservation by selecting that resource and then editing the Tabs. Only the Meeting Title must be consistent across all resources.
A multi-resource reservation offers two new options on the Reservation Details form: Copy Current Tab and Copy All Tabs. This allows you to copy details from one or all tabs on the selected resource to all other resources. In this example, we will add reservation details and services to the Wild Basin Room and then copy those details over to the Lone Star Room.
On the General Tab for the Wild Basin Room, enter the meeting title, Reservation Type and Host Name. Select Copy Current Tab to apply these details to the Lone Star Room.

Select the Lone Star Room to verify details were copied.
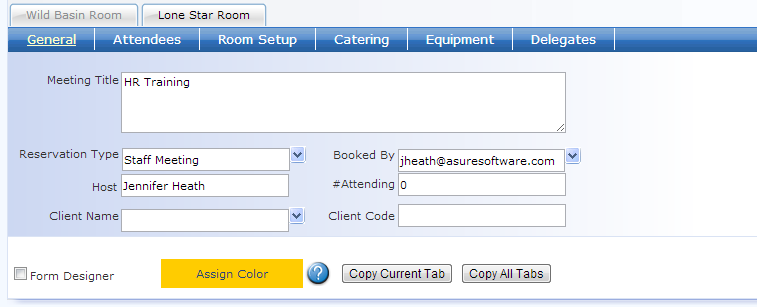
The Lone Star Room
tab is now highlighted, indicating that we are viewing details for that
resource. All details were copied over from the Wild Basin
Room.
It is not necessary
to copy over the meeting title if that is the only mandatory field. That
field must be uniform across all resources and therefore copies automatically.
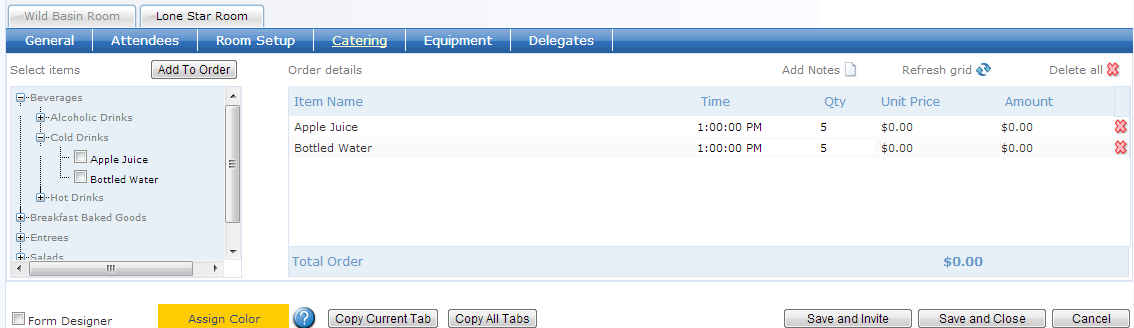
Select
the Catering tab and add service items.
Select the Equipment tab and add service items.
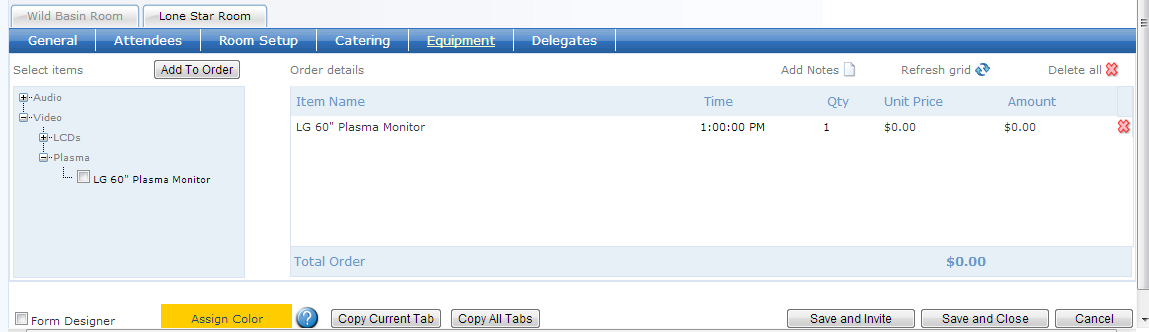
Both Catering and Equipment were added when the Lone Star Room was highlighted, so these options have been added to that resource only. To copy these details over to the Wild Basin Room, select Copy All Tabs. The Select Tabs window appears.
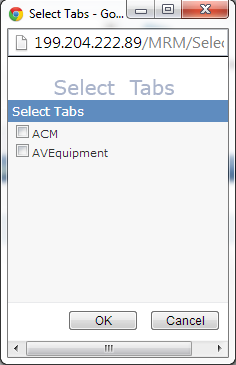
Check the box or boxes next to the services
that you want to copy. The display names here are the actual
database names, so you may need to verify the names with your MRM
System Administrator.
Click OK. You are returned
to the Reservation Details form. Click the Wild Basin tab
to view the tabs for that resource. Check the Catering
and Equipment tabs for that resource. All details from
the Lone Star room have been copied over.
Save and Close or Save and Invite.
Expanding a Single-Resource Reservation
You can also create a multi-resource reservation by adding additional resources to an existing single resource reservation.
Open an existing single-resource reservation
by double-clicking on the Grid or clicking directly on the meeting
title in the Find Reservations form.
Check the box next to the Resource name
in the Resources Window to add it to the reservation. Alternatively,
select the Find Available
Resources option to search for resources that are available at
the selected date and time. Select Find.
Check the box next to the resource name
and click Select to add
the resource to the reservation and return to the Reservation Details
form.
You will now see options to Copy
Current Tab and Copy
All Tabs. You can add details to the new resource accordingly,
then Save and Close or Save and Update.
When selecting the additional resource from the Resources
Window, you will be prompted to copy service orders to the new room. This
copies all Standard and Advanced Services (assuming item availability). This
same option is not available when selecting a resource through the Find Available Resources option.
|
|
We are interested in hearing from you about our products. Visit our customer support portal. Written for Meeting Room Manager 10.0, March 2014, Copyright © 2014 Asure Software Inc. |