
Creating an Outlook appointment with the MRM Add-in is the same process as creating a standard Outlook appointment with the added step of selecting a resource in the MRM tab.
Navigate to the Outlook calendar and
select New to create a new appointment.
Depending on the priority for your reservation
(time, attendee availability or resource availability) navigate to
the Scheduling Assistant or the MRM Tab. The appointment
form will open to the Appointment tab by default. In this
example, we will start our reservation from the Appointment tab, but
you can start from any of the three tabs, and the details will automatically
carry over to the other tabs.
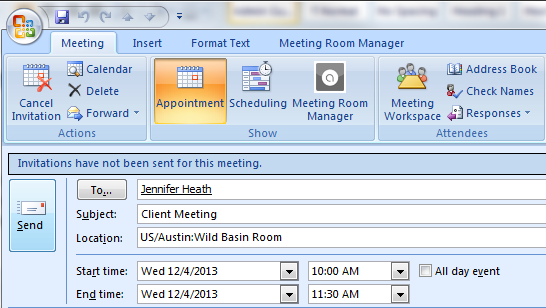
Select the date and time for your new
appointment and enter a meeting title (the meeting title is required
for the MRM reservation. It is entered in the Subject line
in the appointment tab. Notice the Location field is left
blank.
Select the Scheduling Tab to add attendees and view availability. Select the MRM Tab to view resource availability.
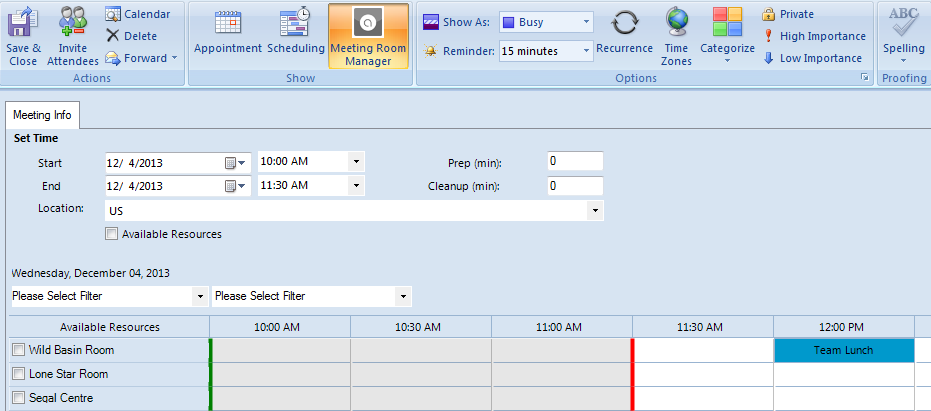
Notice the date and time selected on the Appointment are automatically populated on the MRM tab. The selected time is also highlighted on the grid with the green bar indicating start time and the red bar indicating end time. The location defaults to the Default Location configured in the User Profile of the active user.
Select a resource that is available for the selected date and time by checking the box next to the Resource name on the Reservation Grid. To narrow your view to only available resources, check the Available Resources option just below the location menu.
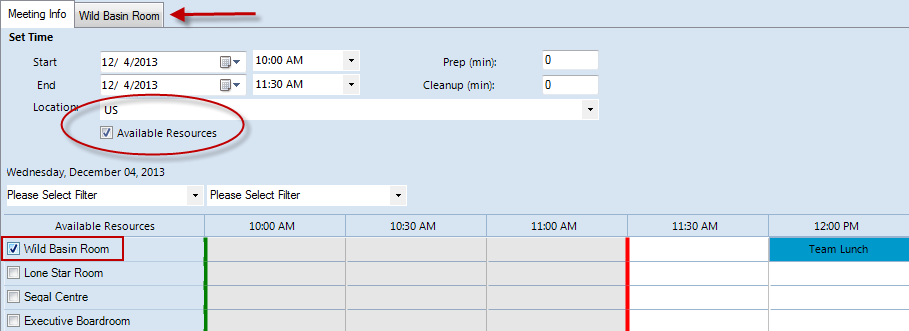
When you select a resource on the Grid, a new tab with the resource name is added to the top of the form. Select this tab to add details to the MRM Reservation.
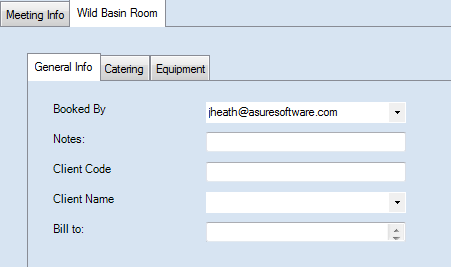
The Add-in form can include up to 10
fields that are mapped over form the MRM Reservation Details form. Any
fields that are mandatory in the Web Client will also be mandatory
in the Outlook Add-in.
Complete fields as needed. Click the Advanced Services tab to create a service order.
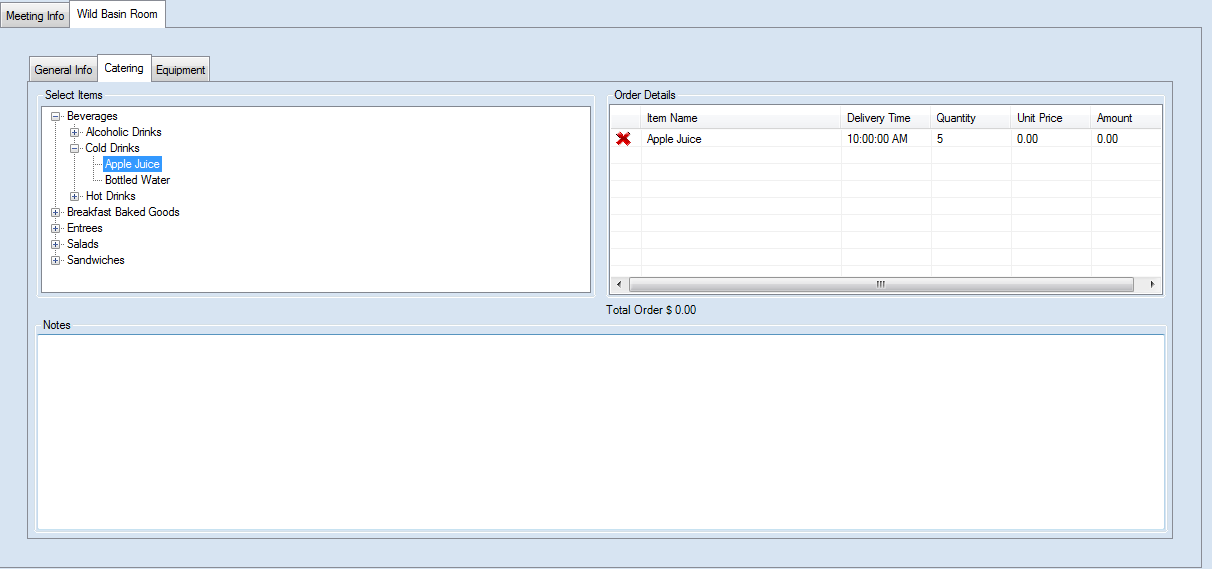
Select service items from the Advanced
Service menus. Adjust the service delivery time and quantity
as needed. You also have the option to add notes.
When all reservation details and service
items have been added, select Save and Close to complete the reservation. If
attendees have been added, you must return to the
Appointment Tab to Send the invitation.
Notice the Location field has been populated with the selected resource. If you log into the MRM Web Client, you will see the Reservation Grid has been updated with this new reservation.
|
|
We are interested in hearing from you about our products. Visit our customer support portal. Written for Meeting Room Manager 10.0, March 2014, Copyright © 2014 Asure Software Inc. |